All posts by mrscottm

Decoration Adventures

Wayfire has decoration plugins and even a shadow plugin available. The shadow plugin works great, for square decorations at least. Adding rounded corners with shadows that hug them would be a nice addition. So, I set out to do that, and the results even surprised me.

I started hacking on pixdecor plugin, first porting it to work with latest wayfire, then adding compute shader support for decoration animations, patterns and overlay effects. Out of all the things, none of the effects had a need to render beyond the decoration area, into the shadow region. This basically meant making the rendering area larger, to have a place to scribble in some shadows. The concept is simple but implementing it required changing the code very carefully in many different places. Even after getting it right, changing some settings might make the decoration the wrong size or some other problem (like crashing). After shaking out the bugs for the shadow padding, it was time to shade some shadows.

I knew I wanted simple code that got straight to the point. After poking around a bit on shadertoy and not finding what I wanted, I decided to write the shader from scratch. Here’s the path I ended up with. First, the decoration is cleared using a clear color or otherwise filled in with an effect shader. Then, the overlay shader is applied. The overlay has eight conditionals, one for each side and one for each corner. For the sides, it measures the distance from the edge to the pixel color being written and mixes transparent with the shadow color, depending on how far away it is. The corner is the same recipe but it picks a single point in the corner and uses it to measure the corner and shadow radius. This means that even though the corners are rounded, the shadows follow the curvature. The other nice thing about the overlay is that is automatically anti-aliases the edges of the rounded corners by mixing, instead of just discarding pixels or other method that leaves jagged corner edges.

All of this, and everything is configurable in real time, from the border size to the corner radius and shadow radius, color, etc. It took some careful coding to make everything work together but in the end, it is working nicely, with great performance. Now, for the video:
Wayfire Smoke

A wayfire user decided to port weston smoke into wayfire and while it worked, it was quite slow, even at modest sizes. I patched weston smoke to be resizable but this only showed how slow the cpu-bound algorithm is. So, I decided to try my hand at making it faster, using a compute shader. At first, there was a single shader but realized that each loop needed its own shader. It was also slow at first but after tweaking the workgroups per dispatch and the workgroup size in each shader, the difference was multi-fold. It took some time to implement and optimize but it worked out pretty well. The code has been uploaded here. The performance improvement results are astounding and there isn’t much else to do than watch some comparison videos:

Original Weston Smoke Client:

Implementation in a Decorator:

Side by Side Standalone Clients:

Wayfire Ubuntu Packages

After more than a few requests for wayfire deb packages that work on ubuntu, I decided to try creating some. The result is a success. This is how I did it.

First, I started with the latest code. I will cover wayland and wayfire packages. There are others that are required, but these two are different in that wayland packages are already in ubuntu but there are none for wayfire.

For wayland, we will copy the debian directory, containing the interesting files for building a package from upstream, and place it in the upstream code directory.

$ git clone https://git.launchpad.net/ubuntu/+source/wayland wayland-ubuntu
$ git clone https://gitlab.freedesktop.org/wayland/wayland wayland-upstream
$ cp -r wayland-ubuntu/debian wayland-upstream

Next, we want to prepare the environment by installing the build dependencies.

$ sudo apt-get build-dep wayland
$ sudo apt install gcc g++ meson ninja debhelper dh-make

Finally we want to configure and build the packages.

$ dh_auto_configure --buildsystem=meson
$ dpkg-buildpackage -rfakeroot -us -uc -b

This results in the following packages:

libwayland-bin_1.19.90-1_amd64.deb
libwayland-client0_1.19.90-1_amd64.deb
libwayland-cursor0_1.19.90-1_amd64.deb
libwayland-dev_1.19.90-1_amd64.deb
libwayland-egl1_1.19.90-1_amd64.deb
libwayland-egl-backend-dev_1.19.90-1_amd64.deb
libwayland-server0_1.19.90-1_amd64.deb

For wayfire, the process is similar but we need to generate the debian files. Install dependencies manually, by satisfying meson first.

$ git clone https://github.com/WayfireWM/wayfire && cd wayfire
$ dh_make --createorig -p wayfire_0.8.0
$ dh_auto_configure --buildsystem=meson
$ dpkg-buildpackage -rfakeroot -us -uc -b
$ ls ../*.deb
../wayfire_0.8.0-1_amd64.deb

Here is a PPA containing all the packages needed for wayfire on Ubuntu >=20.04. To install wayfire:

$ sudo add-apt-repository ppa:soreau/wayfirewm
$ sudo apt-get update
$ sudo apt install wayfire wayfire-plugins-extra wf-shell wcm xwayland

Launch wayfire by running it from X or tty, or simply logout and select the Wayfire session.
To remove completely:

$ sudo apt install ppa-purge
$ sudo ppa-purge ppa:soreau/wayfirewm

Wayfire

Usually I blog about compiz after a release but I wanted to share something different. There is a C++ wayland/wlroots compositor by Ilia Bozhinov in the works that has many compiz-like features. It’s called Wayfire and it has quite a few bells so far. It functions on a plugin based system much like compiz and the API is fairly nice. I’ve written wcm,  a configuration GUI for wayfire inspired heavily by ccsm. There are videos on the website at wayfire.org you can view to see the basics. It will only work with drivers offering gbm however, which basically means it works with open source drivers. Wayfire and wlroots are very much in development so the bleeding edge may not work but when it does, it’s fire.
General build guide for ubuntu 18.04:

1) Install dependencies from packages.

$ sudo apt install git python3-pip pkg-config libwayland-dev autoconf libtool libffi-dev libxml2-dev libegl1-mesa-dev libgles2-mesa-dev libgbm-dev libinput-dev libxkbcommon-dev libpixman-1-dev xutils-dev xcb-proto python-xcbgen libcairo2-dev libglm-dev libjpeg-dev libgtkmm-3.0-dev xwayland

2) Install meson and ninja.

$ pip3 install meson ninja; . ~/.profile

3) Export prefix, PATH and PKG_CONFIG_PATH variables.

$ export prefix=/opt/wayfire
$ export PATH=$prefix/bin:$PATH
$ export PKG_CONFIG_PATH=$prefix/lib/pkgconfig:$prefix/share/pkgconfig:$prefix/lib/x86_64-linux-gnu/pkgconfig

4) Create the installation directory and change user and group so we can install the software as user. Also create a src directory to hold the source code.

$ sudo mkdir $prefix; sudo chown $USER:$USER $prefix
$ mkdir ~/src; cd ~/src

5) Clone the source we will need.

$ git clone https://gitlab.freedesktop.org/wayland/wayland
$ git clone git://anongit.freedesktop.org/wayland/wayland-protocols
$ git clone git://anongit.freedesktop.org/xcb/libxcb
$ git clone https://github.com/swaywm/wlroots
$ git clone https://github.com/WayfireWM/wayfire
$ git clone https://github.com/WayfireWM/wf-shell
$ git clone https://github.com/WayfireWM/wcm

6) Build the source code.

$ cd ~/src/wayland && ./autogen.sh --prefix=$prefix --disable-documentation && make && make install
$ cd ~/src/wayland-protocols && ./autogen.sh --prefix=$prefix && make && make install
$ cd ~/src/libxcb && ./autogen.sh --prefix=$prefix && make && make install
$ cd ~/src/wlroots && meson build --prefix=$prefix && ninja -C build && ninja -C build install
$ cd ~/src/wayfire && meson build --prefix=$prefix && ninja -C build && ninja -C build install
$ cd ~/src/wf-shell && meson build --prefix=$prefix && ninja -C build && ninja -C build install
$ cd ~/src/wcm && meson build --prefix=$prefix && ninja -C build && ninja -C build install

7) Copy config files in place and modify them a bit.

$ cp ~/src/wayfire/wayfire.ini.default ~/.config/wayfire.ini
$ cp ~/src/wf-shell/wf-shell.ini.example ~/.config/wf-shell.ini
$ sed -i 's/env XDG_CURRENT_DESKTOP=GNOME gnome-control-center/wcm/' ~/.config/wf-shell.ini

Optionally set a background image in ~/.config/wf-shell.ini from your system.

8) Save this script as /usr/local/bin/wayfire.

#!/bin/bash

prefix=/opt/wayfire
log_file=/tmp/wayfire.log

export PATH="$prefix"/bin:$PATH
export XDG_DATA_DIRS="$prefix"/share:$XDG_DATA_DIRS
export GTK_THEME=Adwaita:dark
export GDK_BACKEND=wayland
export QT_QPA_PLATFORM=wayland
export LD_LIBRARY_PATH="$prefix"/lib:"$prefix"/lib/x86_64-linux-gnu/
exec "$prefix"/bin/wayfire "$@" &> "$log_file"

8b) Make it executable.

$ sudo chmod +x /usr/local/bin/wayfire

9) Run it.

$ /usr/local/bin/wayfire

9b) Open an application. Either run a native terminal,

WAYLAND_DISPLAY=wayland-0 GDK_BACKEND=wayland terminator

or an X11 one.

DISPLAY=:1 xterm

10) Optionally switch to tty to use the drm backend. Make sure your user is part of the video group to run as user.

sudo adduser $USER video

11) Optionally create /usr/share/wayland-sessions/wayfire.desktop to login from lightdm.

[Desktop Entry]
Version=1.0
Name=Wayfire Session
Comment=Use this session to run Wayfire as your desktop environment
Exec=/usr/local/bin/wayfire
Type=Application

Firefox nightly should work as a native browser. Ctrl+Alt+Bckspc to log out. Any questions should be asked in #wayfire on irc.freenode.net or an issue filed on github for the relevant component. To remove the compiled packages and source, remove /opt/wayfire/, ~/src/, /usr/local/bin/wayfire and /usr/share/wayland-sessions/wayfire.desktop. Checkout wayfire.org for more information.

Compiz Release Announcement – 0.8.14

It’s time for Compiz Reloaded 0.8.14. Here is the changelog:

– Whisker menu resize bug fix
– Improved horizontal and vertical maximizing
– Removed the “Number of Desktops” option
– Fixed crash when displaying special characters in gtk-window-decorator and emerald
– Set rotate and wall default flip bindings to None, which mitigates the problem where edges of screen are unclickable
– Fix potential for skydome silently failing to render
– Don’t fallback for exceeding max texture size
– Improved –button-layout behavior for gtk-window-decorator
– Updated translations
– Introduced window state selector in ccsm
– Improvements to elements, staticswitcher, static and notification plugins
– Added more colorfilters
– Added models for cubemodel plugin
– Added default enabled option for stars, fireflies, wizard and snow
– Increase maximum text size for relevant plugins
– Added earth plugin (built where libcurl and libglew dependencies are available)

The packages can be found here.

There is a script available to install the compiz suite. To use it:

Step 1) – Install Xubuntu 17.04 or your debian-based Linux distribution flavor with sudo installed.

Step 2) – Install git

$ sudo apt-get install git

Step 3) – Download the build script set. Optionally omit ‘-b release-0.8.14’ to build latest compiz-reloaded git master

$ git clone git://northfield.ws/compiz/scripts -b release-0.8.14

Step 4) – Run the INSTALL script

$ ./scripts/go

Step 5) – Start ccsm by typing ccsm in the terminal and verify it runs

$ ccsm

Step 6) – Enable basic plugins such as Window Decoration, Move Window, Place Window, Resize Window and maybe Wobbly so you know it’s working

Step 7) – Start compiz with

$ compiz --replace ccp

Step 8) – Start a compiz window decorator

$ gtk-window-decorator --replace

If everything is working, then congratulations! If not, you can ask in #compiz or #compiz-reloaded on chat.freenode.net or file an issue on github.

The script set includes an uninstall script used to remove everything if needed. Run ./scripts/uninstall to use it.

This version of compiz and other 0.8.x versions may conflict with any 0.9.x compiz, ccsm, emerald or other compiz 0.9.x components.

DISCLAIMER: Not responsible for crazed kittens, disgruntled gnomes or volcanic paint eruptions.

Enjoy!

Compiz Release Announcement – 0.8.12

Hello again. We have joined forces with the mate-compiz team and adopted the new name, Compiz Reloaded. We’ve also moved to github and Compiz 0.8.12 is ready. Here is the changelog:

– Add font family configuration for plugins that draw text such as Group/Tab, Scale Window Title Filter and Workspace Names plugins
– Lessen probability of “white glitches” that happen on resize using gtk-window-decorator and emerald
– gtk-window-decorator, emerald, ccsm, simple-ccsm and fusion-icon support both gtk2 and gtk3
– Fix right click near top edge of maximized windows in gtk-window-decorator and emerald
– Add an option to emerald-theme-manager to disable shading when titlebar is scrolled
– Rename plugins-unsupported to plugins-experimental and add many more plugins
– Change minimum and default amount of waves to 0 for Magic Lamp animation
– Add support for a Super Maximize button in emerald (toggles fullscreen)
– Various fixes for ccsm, simple-ccsm and fusion-icon
– Address vs problem more fully
– Increase maximum Mipmap LOD for Blur plugin
– Move Desktop Wall plugin to core
– Lots of additional Mate support
– Fix crash related to animations
– Fix memory leaks in emerald

The packages can be found here.

There is a script used to install the compiz suite. To use it:

Step 1) – Install Xubuntu 15.10 or your variant of debian-based Linux distribution with sudo installed.

Step 2) – Install git

$ sudo apt-get install git

Step 3) – Download the build script set. Optionally omit -b release-0.8.12 to build latest compiz-reloaded master

$ git clone git://northfield.ws/compiz/scripts -b release-0.8.12

Step 4) – Run the INSTALL script

$ ./scripts/go

Step 5) – Start ccsm by typing ccsm in the terminal and verify it runs

$ ccsm

Step 6) – Enable basic plugins such as Window Decoration, Move Window, Place Window, Resize Window and maybe Wobbly so you know it’s working

Step 7) – Start compiz with

$ compiz --replace ccp

Step 8) – Start a compiz window decorator

$ gtk-window-decorator --replace

If everything is working, then congratulations! You can add ‘gtk-window-decorator’ (without quotes) to ccsm>Effects>Window Decoration>Command field so gtk-window-decorator starts when compiz does. If not, you can ask in #compiz or #compiz-reloaded on chat.freenode.net. Enjoy!

AUDIENCE: This information is targeted toward those familiar with Linux distributions and FOSS.

INFORMATION: The script set includes an uninstall script used to remove everything. Run ./scripts/uninstall to use it.

WARNING: This software and other 0.8.x versions may conflict with any 0.9.x compiz, ccsm, emerald or other compiz 0.9.x components.

DISCLAIMER: Not responsible for unhappy camping, confused vulkans or exploding pixels.

32bit chroot environment on 64bit Ubuntu

Recently, I wanted to setup a chroot environment to build a 32bit library on 64bit host platform. After failing several times trying different things, reading man pages and scouring the web for a solution, I did not find what I was looking for. So, I decided to make this post. Here is what I came up with.

Components:

  1. debootstrap
  2. schroot

Assumptions:

  1. Ubuntu Trusty 64bit host
  2. Ubuntu Trusty 32bit target
  3. Target directory /opt/chroot/trusty-i386/
  4. You know what you’re doing

TLDR:

Install debootstrap and schroot:

# apt-get install debootstrap schroot

Replace your-user-name with the name of your user in the following and put it in /etc/schroot/schroot.conf:

[trusty]
description=Trusty Tahr (i386)
directory=/opt/chroot/trusty-i386
users=your-user-name
root-groups=root
preserve-environment=true
personality=linux32

Run these commands (once) to setup the environment:

# export target_dir="/opt/chroot/trusty-i386"
# apt-get install debootstrap schroot
# debootstrap --include=apt,apt-utils,sudo,dialog --variant=buildd --foreign --arch i386 trusty "$target_dir" http://archive.ubuntu.com/ubuntu/
# chroot "$target_dir" debootstrap/debootstrap --second-stage
# bash -c "echo \"chroot\" > \"$target_dir\"/etc/debian_chroot"
# bash -c "echo \"deb http://us.archive.ubuntu.com/ubuntu/ trusty main restricted universe multiverse\" >> \"$target_dir\"/etc/apt/sources.list"
# bash -c "echo \"deb-src http://us.archive.ubuntu.com/ubuntu/ trusty main restricted universe multiverse\" >> \"$target_dir\"/etc/apt/sources.list"
# chroot "$target_dir" apt-get update
# chroot "$target_dir" locale-gen $LANG

Use this script to enter the chroot (run as user):

#!/bin/bash

target_dir="/opt/chroot/trusty-i386"

sudo mount -o bind /proc "$target_dir"/proc/
sudo mount -o bind /sys "$target_dir"/sys
sudo mount -o bind /dev "$target_dir"/dev
sudo mount -o bind /dev/pts "$target_dir"/dev/pts
sudo mount -o bind /home "$target_dir"/home

sudo cp /etc/resolv.conf "$target_dir"/etc/resolv.conf
sudo cp /etc/hosts "$target_dir"/etc/hosts
sudo cp /etc/passwd "$target_dir"/etc/passwd
sudo cp /etc/shadow "$target_dir"/etc/shadow
sudo cp /etc/group "$target_dir"/etc/group
sudo cp /etc/services "$target_dir"/etc/services
sudo cp /etc/protocols "$target_dir"/etc/protocols
sudo cp /etc/networks "$target_dir"/etc/networks

schroot -c trusty

sudo umount "$target_dir"/proc/ "$target_dir"/sys/ "$target_dir"/dev/pts "$target_dir"/dev/ "$target_dir"/home

To remove the chroot environment completely:

rm -rf /opt/chroot/trusty-i386/*

Notes:

Using schroot is optional, you should be able use the environment ‘normally’ with chroot. I’m not sure why the files in /etc/schroot/default/ are seemingly unused, possibly something to do with a missing schroot config script. The debootstrap program completes leaving /etc/apt/sources.list* empty, perhaps something to do with debian bug #736995, so we populate the sources.list file manually. You may add additional packages you want installed to the –include line. Running debootstrap with –second-stage in the chroot installs these additional packages amongst other things. We also create /etc/debian_chroot with the contents “chroot” so the command prompt is prefixed with “(chroot)”, making it clear that it’s not running the host shell. Installing apt-utils and running locale-gen isn’t particularly necessary but at least it gets rid of some annoying messages when running certain dpkg related commands. The script shown mounts the important directories and copies relevant files needed to chroot into a working environment. One caveat is that it might ask for password after exit for umount. Optionally, corresponding fstab entries could be made and copy the relevant files once, so only the schroot command would be needed. This should be enough to login as your user with access to $HOME and to build and run applications, including X11 apps. Cheers.

Compiz Release Announcement – 0.8.10

It took a bit of setup and cook time but compiz 0.8.10 tarballs are ready now including addons-experimental plugin package. Anyone who has installed compiz before knows it can be confusing so here, I will focus on installing 0.8.10 using the tarballs.

Step 1)  –  Install Xubuntu 14.10 or your variant of *buntu based Linux distribution with sudo installed.

Step 2)  –  Open a terminal

Step 3)  –  Install git

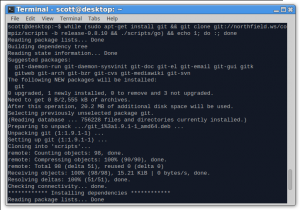
$ sudo apt-get install git

Step 4)  –  Download the build scripts with

$ git clone git://northfield.ws/compiz/scripts -b release-0.8.10

Step 5)  –  Run the INSTALL script

$ ./scripts/INSTALL

terminal

Step 6)  –  Start ccsm by typing ccsm in the terminal and verify it runs

$ ccsm

Step 7)  –  Enable basic plugins such as Window Decoration, Move Window, Place Window, Resize Window and maybe Wobbly so you know it’s working

Step 8)  –  Start compiz with

$ compiz –replace ccp

Step 9)  –  Open another terminal

Step 10)  –  Start a compiz window decorator

$ emerald –replace

If everything is working, then congratulations! You can add ’emerald’ (without quotes) to ccsm>Effects>Window Decoration>Command field so emerald starts when compiz does.  If not, you can ask in #compiz or #northfield on irc.freenode.net using your IRC client or visit wiki.compiz.org. Enjoy!

AUDIENCE: This information is targeted toward those familiar with Linux distributions and GNU open source software.

INFORMATION: The compiled runtime executable files and libraries will be installed to /usr/ and icons for ccsm can be found in /usr/share/ccsm/icons/hicolor/scalable/. Emerald includes emerald-theme-manager which can be run from a terminal. To remove, run ‘make uninstall’ in each of the source directories in ~/src/compiz/.

WARNING: This software and other 0.8.x versions may conflict with any 0.9.x compiz, ccsm, emerald or other compiz 0.9.x components.

DISCLAIMER: Not responsible for soggy corn flakes, mistreated kittens or spontaneously combusting laptops.

Compiz Maintenance

Hello again. It’s been awhile and now it’s time for another blog post. Included are the details of a compiz maintenance routine outline and release schedule preview.

For those that do not keep track, here is a general overview. My name is Scott Moreau and I’ve been working on compiz for about 8 years by wearing the hats of support, script writer, code contributer and now, maintainer. Over time, many left the project entirely. In the past 4 years, I have been maintaining the official upstream compiz with the assistance of long time server maintainer, Guillaume Seguin. Fortunately, it hasn’t been too much work and graphics drivers have improved greatly thanks to companies like Intel, AMD, RedHat, Novell, Canonical, Collabora, Mozilla, Google, Valve and the many interesting people they’ve employed. Without further ado, here is the general road map outline as it stands currently:

1) Take a snapshot of the preserved original C implementation  of all compiz components (currently 0.8.9) including patches we’ve tossed in to keep things going, and make a release dubbed 0.8.10.

2) Test thoroughly

2b) Bump version to 0.8.11

3) Work out obvious, easily fixable problems and consider small improvements, with a strong focus on defaults.

4) Make an eventual 0.8.12 release, when it’s ready.

5) …


I am working on plugins-experimental, a collection of plugins that never really saw the light of day. Not only are these great plugins, but I would like to present this as a celebration of their works and contributions to compiz development throughout the years.

Finally, I would like to thank all of the contributers, developers and testers alike, especially those that have worked hard to improve open source software we cherish today and will continue to use for many years to come. Here is a list of talented individuals, sorry if I’m forgetting anyone.

Sam Lantinga

Ryan Gordon

Richard Goedeken

David Reveman

Pierre Bourdon

Dennis Kasprzyk

Danny Baumann

Guillaume Seguin

Sam Spilsbury

David Richards

Kristian Hoegsberg

Pekka Paalanen

Kristian Lyngstøl

Dave Airlie

All the testers and users worldwide…

Wayland Wobbly Whistles

I found some time and inspiration to resume working toward wobbly wayland surfaces. After making decent progress, it’s time for another blog entry.

Effects such as wobbly windows are argued by some to be a blatant waste of time for both developers and users. However, many still enjoy wobbling their windows despite the controversy. Some power users claim that the mindless wobbling is a welcome brain rest during other tasks. Critics aside, the effect continues to live on in different forms and implementations.

In this iteration, I decided to port the original compiz plugin to wayland surfaces. First, I isolated the code to identify the algorithm inputs and bound the output to a more easily portable format. Then I worked on massaging it into the compositor code, creating a rudimentary plugin API. In the process, the zoom code was also isolated in it’s own plugin. For the moment, plugins aren’t loaded automatically and must be specified in the config file.

Surprisingly, the model positioning code is the most complicated issue because the plugin must render such that the surface position is synced with the compositor when the wobbling cycles are complete. One annoying positioning problem was related to a combination of rotating and resizing but I managed to track down the core issue and fix this case.

The way opaque and blend regions are handled requires duplicate rendering; one with the opaque rbgx shader and another pass for blended rgba. Since wobbly requires additional arbitrary vertices, it’s not really feasible to draw two different regions. For now, it uses the usual rgba shader if the blend region is not empty and the rgbx shader otherwise.

Further plans include writing an interface to talk to the compositor from a GUI and more compiz-like plugins. Check back later for more updates.